Decadent Chocolate Peanut Butter Cup Macarons: Your Ultimate Guide
Prepare to embark on a delightful culinary journey with a dessert that perfectly marries two of the most beloved flavors on the planet: rich chocolate and creamy peanut butter. Is there any combination more iconic or satisfying? We certainly don’t think so! That’s precisely why we’re thrilled to share our exquisite recipe for Chocolate Peanut Butter Cup Macarons – a truly irresistible treat that promises to elevate your baking prowess and delight every palate.
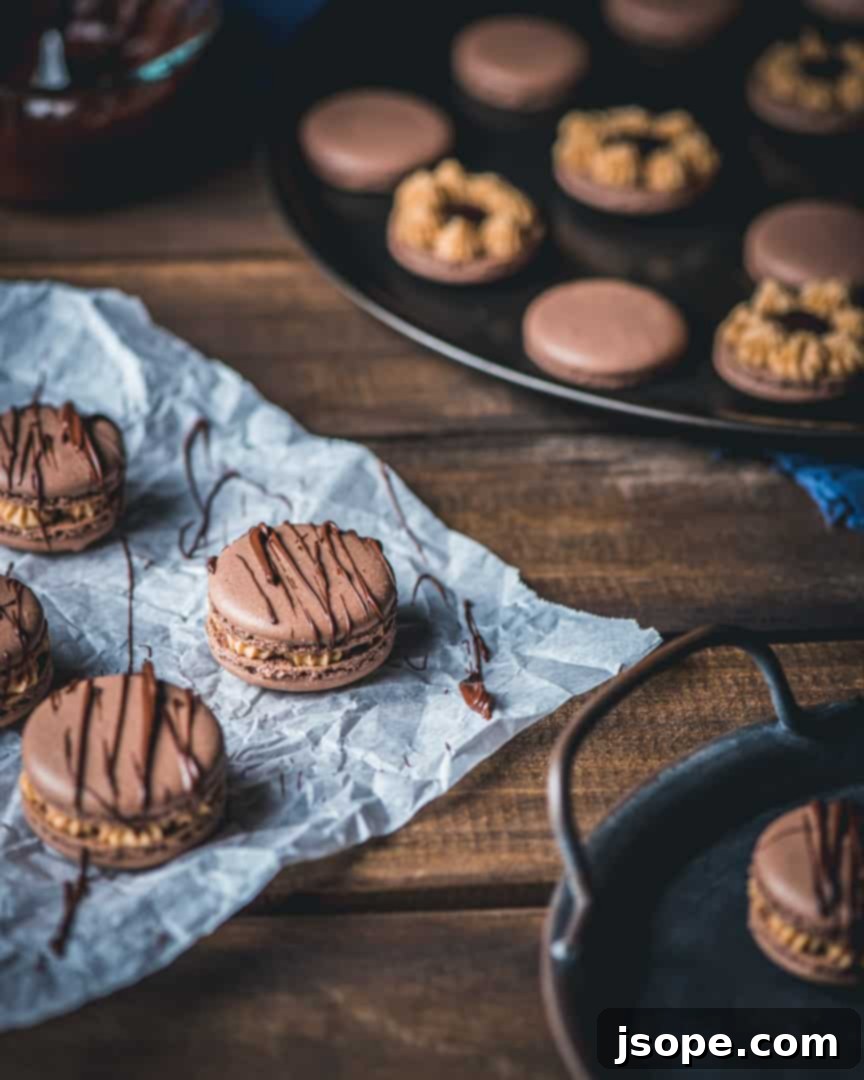
These aren’t just any macarons; they are a sophisticated homage to the classic peanut butter cup, reimagined as elegant French pastries. Each delicate, crisp chocolate macaron shell encases a luxurious filling: a silky smooth, intensely flavorful dark chocolate pastry cream at its heart, surrounded by a light, airy, and utterly divine whipped peanut butter frosting. The interplay of textures and tastes in every bite is nothing short of magical, creating a dessert experience that is both comforting and gourmet.
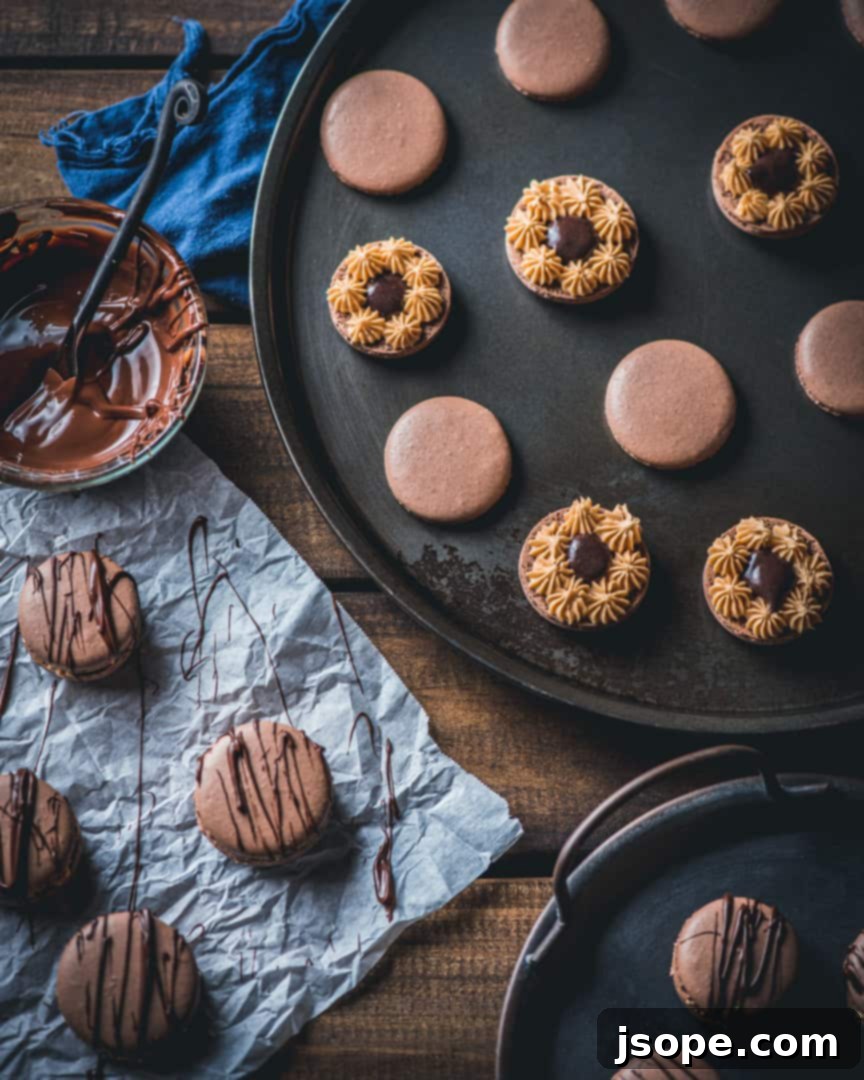
While the allure of macarons might seem intimidating to some, the reward of biting into these perfectly crafted, flavor-packed cookies is well worth the effort. For those new to the art of macaron making or seeking to refine their technique, we highly recommend exploring our comprehensive guide on Snickerdoodle Macarons. That post offers a wealth of detailed tips and tricks derived from our extensive baking experience, designed to help you achieve macaron success. Additionally, an excellent external resource for comprehensive macaron education can be found at Pies and Tacos’ Macaron School, which provides invaluable insights for both beginners and seasoned bakers.
Crafting Perfect Chocolate Macaron Shells
The foundation of any great macaron lies in its shell, and for these chocolate peanut butter delights, we need a shell that is both structurally sound and intensely flavorful. Crafting macaron shells is often considered an art, demanding precision and attention to detail. Unlike many other cookies, macarons are not very forgiving; a slight deviation in ingredients or technique can lead to less-than-perfect results. But don’t let this deter you! With careful measurements and a clear understanding of the process, you’ll be piping beautiful shells in no time, ready to embrace the journey of baking these delicate treats.
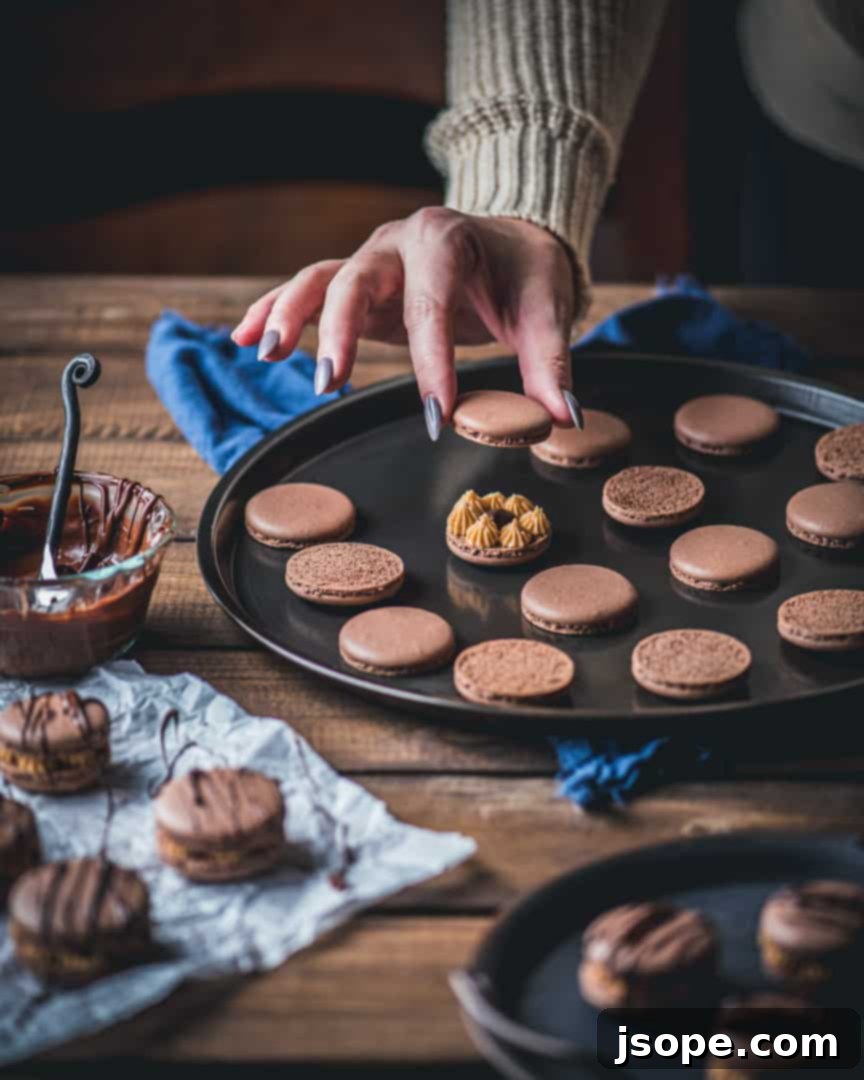
Our recipe for these chocolate shells primarily utilizes the French method, a popular approach known for its simplicity and excellent results. This method involves whipping egg whites with sugar to create a stable meringue, then gently folding in dry ingredients. However, if you are more comfortable with the Italian (which involves hot sugar syrup) or Swiss meringue methods (using a double boiler), feel free to adapt this recipe to your preferred technique. The key is consistency and understanding how your chosen method affects the meringue’s stability and volume. Regardless of the method, the precise weighing of ingredients is paramount, especially when incorporating dry additions like cocoa powder.
One crucial aspect of making chocolate macaron shells is accounting for the cocoa powder. Cocoa powder is a dry ingredient that absorbs moisture, and simply adding it to a standard macaron recipe without adjustment can throw off the delicate balance of your batter, potentially leading to ‘wonky’ or cracked macarons. For this recipe, we use 15 grams of Dutch-processed cocoa powder, which is added directly to the almond flour and confectioner’s sugar in the food processor at the initial stage. Dutch-processed cocoa powder tends to be darker and less acidic than natural cocoa, contributing to a richer chocolate flavor and color. To maintain the ideal dry-to-wet ingredient ratio, it’s essential to reduce the amount of confectioner’s sugar proportionally to compensate for the added cocoa powder. This small but significant adjustment ensures your shells achieve the desired texture and ‘feet’ – the characteristic ruffled edge that defines a perfect macaron.
You might notice that the natural color of chocolate macaron shells, even with Dutch-processed cocoa, can appear relatively light after baking. If you prefer a deeper, more intense chocolate hue, a small amount of brown food gel coloring (not liquid coloring, which can alter batter consistency) can be added to the meringue during the beating process. However, we found that drizzling a bit of melted chocolate over the finished shells beautifully enhanced their appearance, making additional coloring unnecessary for this batch. The subtle elegance of a lighter chocolate shell often contrasts beautifully with the rich, dark filling, creating an aesthetically pleasing treat.
Achieving the perfect macaronage (the mixing phase after meringue and dry ingredients are combined) is another critical step. The batter should reach a “lava-like” consistency, flowing slowly and evenly off your spatula in a continuous ribbon. Overmixing will result in runny batter that spreads too thin, leading to flat, fragile shells without feet. Conversely, undermixing will yield a stiff batter that retains peaks after piping and prevents the formation of those coveted ‘feet.’ Patience and observation are your best tools here, practicing until you recognize the ideal flow.
Once piped, allowing the shells to rest until a skin forms is vital. This ‘drying’ period, often referred to as “crusting,” typically takes 45 minutes to an hour (or sometimes longer depending on humidity) in a draft-free environment. This crucial step prevents cracking during baking and promotes the formation of those coveted feet. Finally, baking one tray at a time in a precisely preheated oven at 275°F (135°C) for about 15 minutes ensures even baking and consistent results. These meticulous steps collectively contribute to the success of your stunning chocolate macaron shells, paving the way for a truly delightful dessert experience.
To witness the entire process, from shell preparation to assembly, you can view a comprehensive video guide on Instagram: Making Chocolate Peanut Butter Cup Macarons.
The Heart of the Macaron: Irresistible Fillings
While perfectly baked shells are essential, the filling is what truly transforms a macaron into an unforgettable indulgence. For our Chocolate Peanut Butter Cup Macarons, we’ve crafted two complementary fillings that work in harmony to create a symphony of flavors and textures: a rich dark chocolate pastry cream and a light, whipped peanut butter frosting. Each component plays a vital role in achieving the signature taste profile of this delightful treat, echoing the beloved flavors of a classic peanut butter cup.
Decadent Dark Chocolate Pastry Cream
The dark chocolate pastry cream serves as the luxurious core of these macarons, offering a deep, intense chocolate flavor that beautifully balances the sweetness of the shells and the richness of the peanut butter. This pastry cream is a component that you’ll want to prepare well in advance. Ideally, it should be made several hours before you plan to assemble the macarons, or even the day before, to allow it ample time to chill and set properly. A minimum of 2-3 hours in the refrigerator is necessary for it to firm up to the desired piping consistency, but an overnight chill yields the absolute best results, allowing the flavors to fully meld and the texture to become perfectly smooth and luscious. This pre-preparation not only saves time on assembly day but also ensures the cream is perfectly set to hold its shape within the macaron.
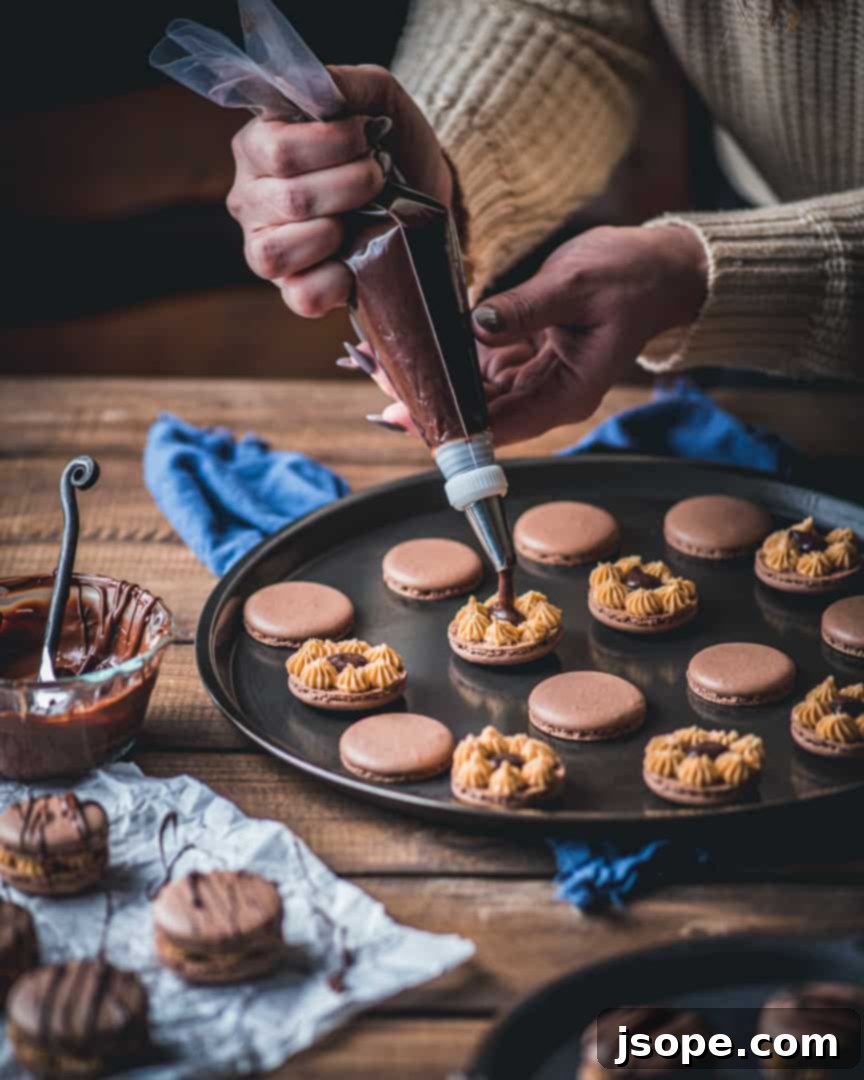
Making this dark chocolate pastry cream is surprisingly straightforward, involving basic custard techniques of whisking egg yolks with sugar, flour, and starch, then tempering with hot cream before thickening on the stove. It’s also incredibly versatile and can be used in a myriad of other desserts, from tarts and éclairs to simple fruit parfaits. However, its rich profile truly shines when paired with the nutty sweetness of peanut butter in these macarons. One secret ingredient that elevates the chocolate flavor to new heights is a touch of instant espresso powder. Don’t worry, it won’t make your pastry cream taste like coffee! Instead, the espresso powder acts as a flavor enhancer, intensifying the chocolate notes and adding a subtle depth without introducing any distinct coffee taste. This is a common chef’s trick to make chocolate taste “more chocolatey.” While you can certainly omit this ingredient if you prefer, we highly recommend including it for that extra ‘oomph’ of chocolatey goodness that sets this pastry cream apart.
A Crucial Note on Pastry Cream as a Macaron Filling:
It’s important to be aware of the nature of pastry cream when used as a macaron filling. Due to its inherent moisture content, macarons filled with pastry cream tend to soften and can become soggy after approximately two days, especially if not stored optimally. For optimal enjoyment and to experience the perfect crisp-chewy texture, these chocolate peanut butter macarons are best consumed within 48 hours of assembly. Store them in an airtight container in the refrigerator to maximize their freshness. If you’re planning to make a batch that needs to last longer, perhaps for gifting or future indulgence, we recommend opting for a more stable filling like a classic chocolate ganache or a robust buttercream, which typically have a longer shelf life and are less prone to moisture transfer into the delicate macaron shells. Nevertheless, the unparalleled creaminess and rich flavor of this pastry cream make it an absolutely delicious choice for macarons meant to be savored fresh!
Velvety Whipped Peanut Butter Frosting
Now, let’s talk about the peanut butter component of these macarons – specifically, our whipped peanut butter frosting. To call this frosting “delicious” would be an understatement; it is, quite literally, a dream! Its light, fluffy texture and intense peanut butter flavor make it incredibly tempting to eat by the spoonful directly from the bowl. This frosting is not only exceptionally tasty but also remarkably simple to prepare, requiring just a handful of common pantry staples: smooth peanut butter (ensure it’s not natural peanut butter with oil separation, as this can affect consistency), confectioner’s sugar, pure vanilla extract, and softened unsalted butter.
For the best results when making this whipped peanut butter frosting, we recommend using an electric hand mixer, though a stand mixer with a paddle attachment will also work wonderfully. Begin by combining the smooth peanut butter, confectioner’s sugar, and vanilla extract in a mixing bowl. Beat these ingredients together until they are well incorporated and smooth. Then, gradually add the room-temperature butter, one tablespoon at a time, continuing to beat until the mixture transforms. You’ll notice it becoming incredibly smooth, light, and airy, developing a wonderfully fluffy consistency that is perfect for piping. The key is to whip it sufficiently so that it lightens in color and texture, achieving a truly “whipped” quality that contrasts beautifully with the dense pastry cream and crisp macaron shells. Make sure your butter is truly at room temperature for the smoothest, creamiest result.
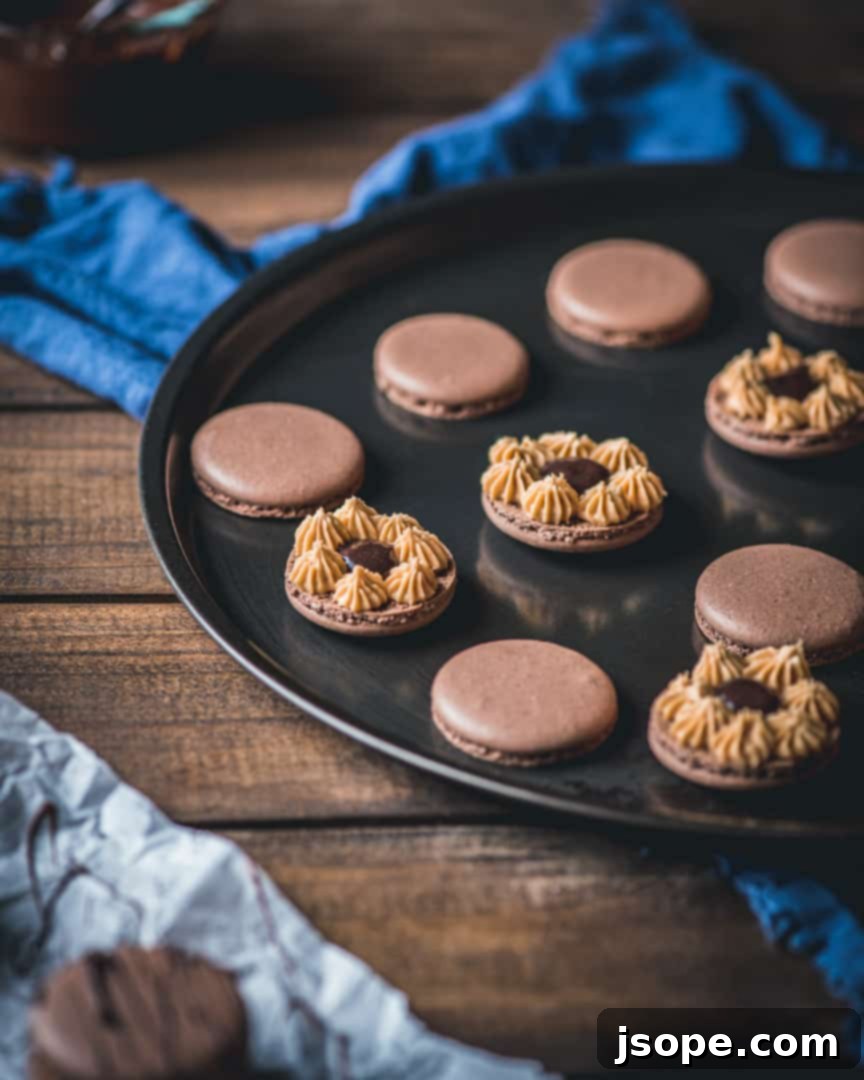
Once your whipped peanut butter frosting reaches this delightful consistency, transfer it into a piping bag fitted with your preferred tip. A simple round tip works perfectly for creating the outer ring of frosting on your macaron shells. Set it aside while your macaron shells cool completely. It’s crucial that the shells are entirely cool before filling to prevent the frosting from melting or the shells from becoming prematurely soft and sticky. The combination of this airy peanut butter cloud with the rich chocolate pastry cream is what makes these macarons truly exceptional, delivering that classic chocolate peanut butter cup experience in an elegant, bite-sized form that is sure to impress.
Savoring Your Homemade Chocolate Peanut Butter Cup Macarons
After all your careful effort in baking these exquisite Chocolate Peanut Butter Cup Macarons, the most rewarding part is finally here: enjoying them! These delicate French pastries, with their crisp shells and creamy, flavorful fillings, are perfect for any occasion – a special treat for yourself, an elegant dessert for guests, or a delightful homemade gift. The unique combination of rich dark chocolate pastry cream and fluffy whipped peanut butter frosting encased within tender chocolate macaron shells creates an unparalleled taste experience that truly celebrates the beloved pairing of chocolate and peanut butter.
We genuinely hope you find immense joy in both the process of creating and the pleasure of tasting this incredible recipe. Macaron making is a journey of precision, patience, and passion, and each successful batch is a testament to your growing skill. Don’t be discouraged by initial imperfections; every baker starts somewhere, and practice truly makes perfect. The learning curve is part of the fun, and the delicious reward is always worth it.
Should you decide to embark on this delicious adventure and give our Chocolate Peanut Butter Cup Macarons a try, we would absolutely love to hear about your experience! Please feel free to leave us a comment below to share your thoughts, tips, or any creative variations you might discover. Your feedback and personal touches are always an inspiration to us and our community of fellow bakers. Alternatively, if you share your beautiful creations on Instagram, don’t forget to tag us @cooking_with_wine so we can admire your work and share in your baking triumph!
For those who love exploring delightful and unique macaron flavors, or simply seeking more exquisite baking inspiration, be sure to check out some of our other popular recipes that will tantalize your taste buds and challenge your baking skills:
- Snickerdoodle Macarons with Cinnamon Sugar Pastry Cream: A comforting twist on the classic cookie, reimagined as a delicate macaron.
- Peppermint Bark Macarons: Perfect for the holiday season, or any time you crave a refreshing chocolate mint treat.
- White Chocolate Raspberry Bundt Cake: A stunning and delicious cake, ideal for gatherings and celebrations.
📖 Recipe
Chocolate Peanut Butter Cup Macarons
Pin Recipe
Ingredients
Chocolate Pastry Cream
- ¾ cup heavy cream
- 3 tablespoon dutch processed cocoa powder
- 2 tablespoon all purpose flour
- ½ teaspoon cornstarch
- ¼ cup granulated sugar
- ⅛ teaspoon salt
- 1 teaspoon instant espresso
- 2 egg yolks
- ½ teaspoon vanilla
Shells
- 112 g almond flour (approx 1 cup)
- 210 g confectioners sugar (approx 2 cups)
- 15 g dutch processed cocoa powder
- 105 g egg whites (approx 3 large eggs)
- pinch of salt
- ¼ teaspoon cream of tartar
- 50 g granulated sugar (approx ¼ cup)
- ¼ teaspoon vanilla extract
- ¼ teaspoon chocolate extract
Whipped Peanut Butter Frosting
- ½ cup smooth peanut butter
- ½ cup confectioners sugar
- ¼ teaspoon vanilla extract
- 6 tablespoon butter, room temperature
Instructions
MAKE THE CHOCOLATE PASTRY CREAM
- Add cream to a saucepan over low heat. You want to heat the cream just until steaming, but not boiling.
- In a medium bowl, whisk together cocoa powder, flour, cornstarch, granulated sugar, salt, and instant espresso until thoroughly combined.
- Add egg yolks to the dry cocoa mixture and whisk vigorously until well combined and smooth, forming a thick paste.
- Slowly temper the egg yolk mixture by gradually adding about ¼ of the warmed cream, whisking constantly to prevent the eggs from scrambling. Gradually incorporate the remaining warm cream until the mixture is completely smooth.
- Return the entire contents to the saucepan and increase heat to medium. Cook, whisking constantly and scraping the bottom of the pan to prevent scorching. The mixture should thicken to a rich, pudding-like consistency within 5 minutes.
- Once thickened, remove the saucepan from heat and stir in the vanilla extract until fully incorporated.
- Strain the hot pastry cream through a fine-mesh sieve into a clean bowl to remove any potential lumps and ensure a perfectly smooth texture. Cover the surface directly with plastic wrap, pressing it down so it touches the cream to prevent a skin from forming. Refrigerate for a minimum of 3 hours, or preferably overnight (up to 24 hours), until firm enough to pipe.
SHELLS
- In a food processor, combine almond flour, confectioner’s sugar, and Dutch-processed cocoa powder. Pulse several times until the mixture is thoroughly combined and free of any large clumps, ensuring a fine, consistent texture. Set this aside.
- Measure out your egg whites (for best results, use aged egg whites that have been at room temperature for at least 30 minutes). Place them in a large, impeccably clean mixing bowl along with a pinch of salt and cream of tartar. Beat on high speed using an electric mixer until the egg whites become foamy, which typically takes about 30 seconds.
- Gradually add the granulated sugar, a tablespoon at a time, while continuing to beat on high speed. Continue beating until the egg whites transform into a glossy, fluffy meringue with soft peaks (approximately 3-5 minutes). Soft peaks mean that when you lift the beaters, the meringue tips gently curl over onto themselves.
- Add the vanilla extract and chocolate extract (if using) and continue beating until stiff peaks are achieved. At this stage, the meringue should hold its shape firmly when the beaters are lifted, with tips standing straight up without drooping.
- Take your prepared almond flour, confectioner’s sugar, and cocoa powder mixture and sift it using a fine-mesh sieve or a manual sifter directly over the meringue. Discard any larger clumps or bits that do not pass through the sieve; this step is crucial for smooth macaron tops.
- Using a rubber spatula, carefully begin the “macaronage” process. Gently fold the dry ingredients into the meringue by scooping the batter from the bottom of the bowl and folding it over the top. As you fold, gently press the batter against the side of the bowl to remove some air. Continue this folding process for approximately 50 turns, or until the batter achieves a “lava-like” consistency. This means the batter flows slowly and continuously off the spatula in an even ribbon when lifted, without breaking. This is the most critical step for proper macaron texture.
- Prepare your baking trays by lining them with silicone baking mats or parchment paper. Transfer the macaron batter into a piping bag fitted with a 1A (or similar large round) piping tip, taking care to minimize the introduction of extra air bubbles as you fill the bag.
- Pipe ½-inch round discs onto your prepared baking sheets, leaving about 1 inch between each macaron to allow for spreading. Work with one sheet at a time. Once piped, firmly tap the baking sheet onto your counter or work surface 4-5 times to release any trapped air bubbles. Use a toothpick to gently pop any remaining larger air bubbles or to fill small holes on the surface. Repeat this process for the remaining baking sheets. This recipe typically yields around 50-60 macaron shells.
- Allow the piped macaron shells to “dry” or form a skin. Place them in a cool, draft-free location for 45 minutes to 1 hour, or until the surface of the shells is no longer sticky to the touch. A properly formed skin is crucial for developing the characteristic “feet” during baking and preventing cracks.
- Preheat your oven to 275°F (135°C). Ensure your oven temperature is accurate; an oven thermometer can be very helpful here, as consistent temperature is vital for macaron success.
- Bake one tray of macaron shells at a time for 15 minutes. If you have an electric oven that bakes evenly, you likely won’t need to rotate the tray. However, if you have a gas oven or one known for uneven baking, consider rotating the tray halfway through (after 7-8 minutes) to ensure uniform baking and even feet development.
- Once baked, remove the tray from the oven and allow the shells to cool completely on the baking mat/parchment paper before attempting to remove them. Warm shells will stick and break easily. Once cooled, they should peel off effortlessly. Pair the shells, add your prepared fillings, and enjoy! For the absolute best flavor and texture, allow the assembled macarons to “mature” in an airtight container in the refrigerator for 24 hours before eating. This allows the fillings to soften the cookie slightly and marry the flavors beautifully.
WHIPPED PEANUT BUTTER FROSTING
- While your macaron shells are cooling, begin preparing the whipped peanut butter frosting. Ensure your butter is at proper room temperature for smooth whipping.
- In a clean mixing bowl, combine the smooth peanut butter, confectioner’s sugar, and vanilla extract. Using an electric hand mixer or a stand mixer with the paddle attachment, beat these ingredients together on medium speed until they are thoroughly combined and smooth.
- Gradually add the room-temperature butter, one tablespoon at a time, to the peanut butter mixture. Continue beating on medium-high speed until the frosting becomes incredibly smooth, light, and fluffy, showing a noticeable increase in volume and a lighter color. Scrape down the sides of the bowl as needed to ensure everything is incorporated.
FILLING THE MACARONS
- Transfer the prepared whipped peanut butter frosting and the chilled chocolate pastry cream into two separate piping bags, each fitted with your desired small round piping tip (a #10 or #12 is often suitable).
- Take one cooled macaron shell. Pipe a neat ring of the whipped peanut butter frosting around the outer edge of its flat side, leaving a small gap in the center.
- Carefully pipe a dollop of the chocolate pastry cream into the middle of the peanut butter ring, filling the open space.
- Gently place another macaron shell on top, pressing lightly to secure the filling and create a perfect sandwich. Be careful not to press too hard, as the shells are delicate.
- Repeat with the remaining shells and fillings until all macarons are assembled. Once assembled, enjoy immediately or refrigerate in an airtight container for optimal flavor development (maturation) for 24 hours.
