Please note: This post has been proudly sponsored by Calphalon. Rest assured, all opinions expressed herein are entirely our own and reflect our genuine experiences.
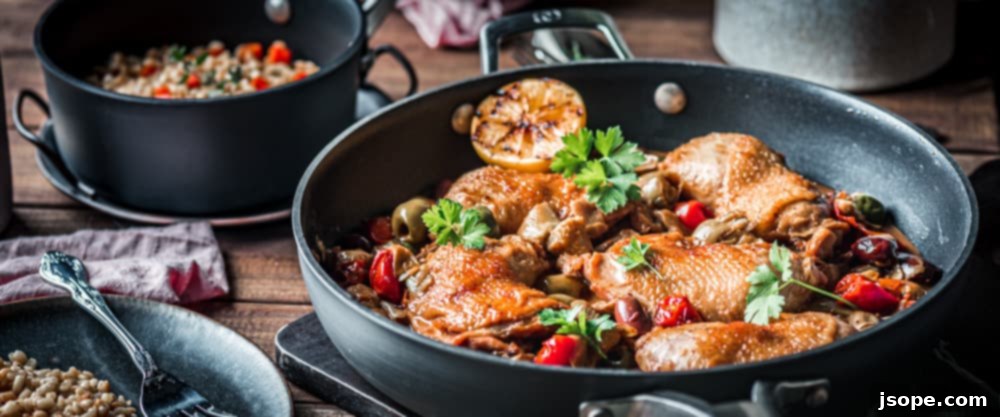
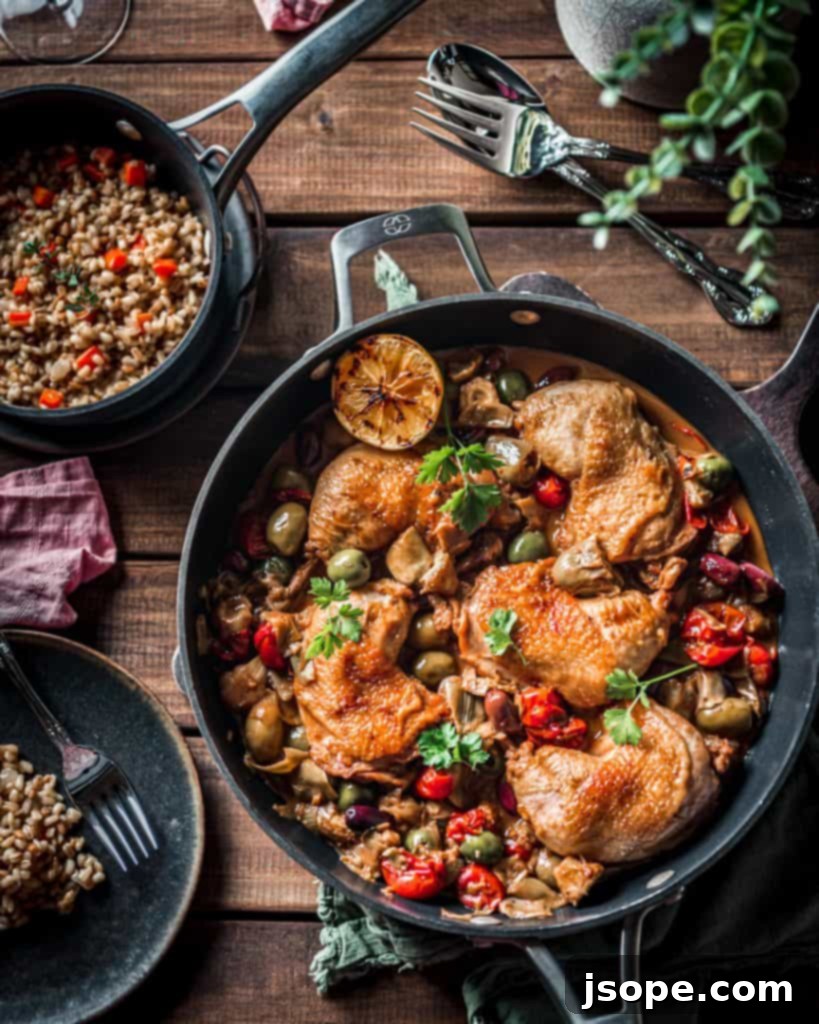
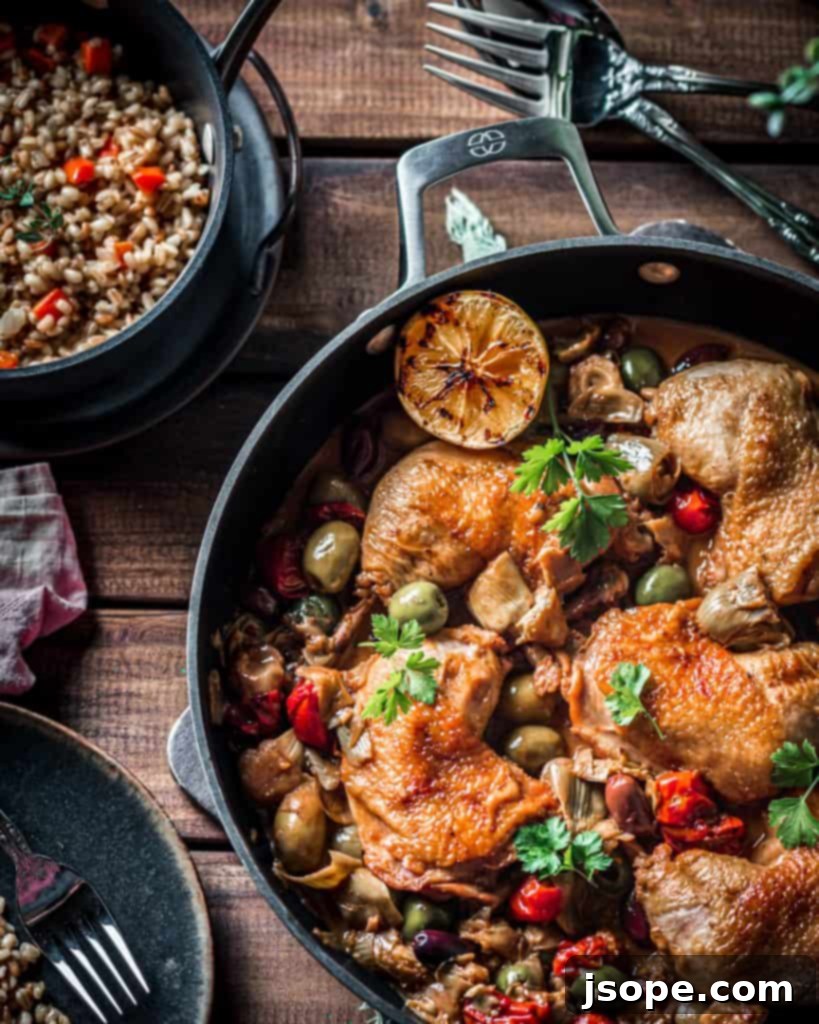
Prepare to tantalize your taste buds with a dish that marries a harmony of Mediterranean-inspired flavors: our incredible Olive and Artichoke Braised Chicken. This recipe is more than just a meal; it’s a culinary experience designed to bring joy and robust flavors to your table, creating a winning combination that the entire family will undoubtedly adore. Each bite of tender chicken is infused with the aromatic essence of olives and artichokes, making it a truly unforgettable main course. Paired exquisitely with our hearty and flavorful Barley Pilaf, this dish offers a balanced and utterly satisfying dinner that stands out from the ordinary.
Braising, an age-old cooking technique, is celebrated for its ability to transform simple ingredients into dishes bursting with deep, complex flavors and melt-in-your-mouth tenderness. This method expertly combines initial high-heat searing with a slow, moist-heat finish, ensuring the chicken remains incredibly juicy while absorbing the rich nuances of the accompanying sauce. We invite you to explore the nuances of this technique with us, as we guide you through creating a meal that is both sophisticated and surprisingly simple to master.
Unlocking Flavor: What It Means to Braise Chicken
Braising is a cornerstone of classic cuisine, a technique revered for its profound ability to infuse ingredients with incredible flavor and achieve unparalleled tenderness. At its core, braising involves a two-step cooking process that intelligently combines both dry and wet heat methods. It typically begins with a vigorous sauté or sear of your protein – in this case, chicken – in a hot pan. This crucial initial step is not merely about browning; it’s about initiating the Maillard reaction, a chemical process that creates rich, complex savory flavors and a beautiful caramelized crust on the chicken’s surface. For this foundational sear, we relied on the exceptional heat distribution of our Calphalon PremierTMHard-Anodized Nonstick 12″ Fry Pan, ensuring a perfect golden finish.
Once seared, the chicken is then partially submerged in a flavorful liquid, which can be a combination of stock, wine, herbs, and aromatics. The pan is then covered, and the dish is slowly cooked at a lower, controlled heat, most commonly in the oven. This long, gentle cooking process in a moist environment allows the connective tissues within the chicken to slowly break down. The result is consistently tender, moist, and succulent chicken meat that practically falls off the bone, thoroughly permeated with the intricate flavors of the braising liquid. The liquid itself transforms into a rich, concentrated sauce that is served directly with the dish, making it a convenient and delicious way to enhance every spoonful of your chicken.
It’s a common culinary understanding that while chicken is a versatile protein, its inherent flavor can sometimes be subtle. This is precisely where the magic of braising truly shines. By thoughtfully developing a vibrant, complex sauce that the chicken cooks in, we elevate its natural taste to new heights. The sauce doesn’t just moisten the chicken; it becomes an integral part of its flavor profile, transforming an everyday protein into a gourmet experience. This technique ensures your chicken is not just cooked, but thoroughly celebrated, offering a depth of taste far beyond what simple pan-frying or roasting can achieve.
Expert Tips for Crafting Your Olive and Artichoke Braised Chicken Masterpiece
While braising may sound like a technique reserved for seasoned chefs, it is, in fact, a remarkably approachable method that any home cook can master with ease. Our recipe for Olive and Artichoke Braised Chicken takes this accessible technique and elevates it with a few carefully considered touches that, in our experienced opinion, significantly enhance the overall dish. These extra steps are designed to optimize texture, deepen flavors, and ensure a memorable culinary outcome, transforming your chicken into something truly special.
The Secret to Irresistibly Crispy Chicken Skin
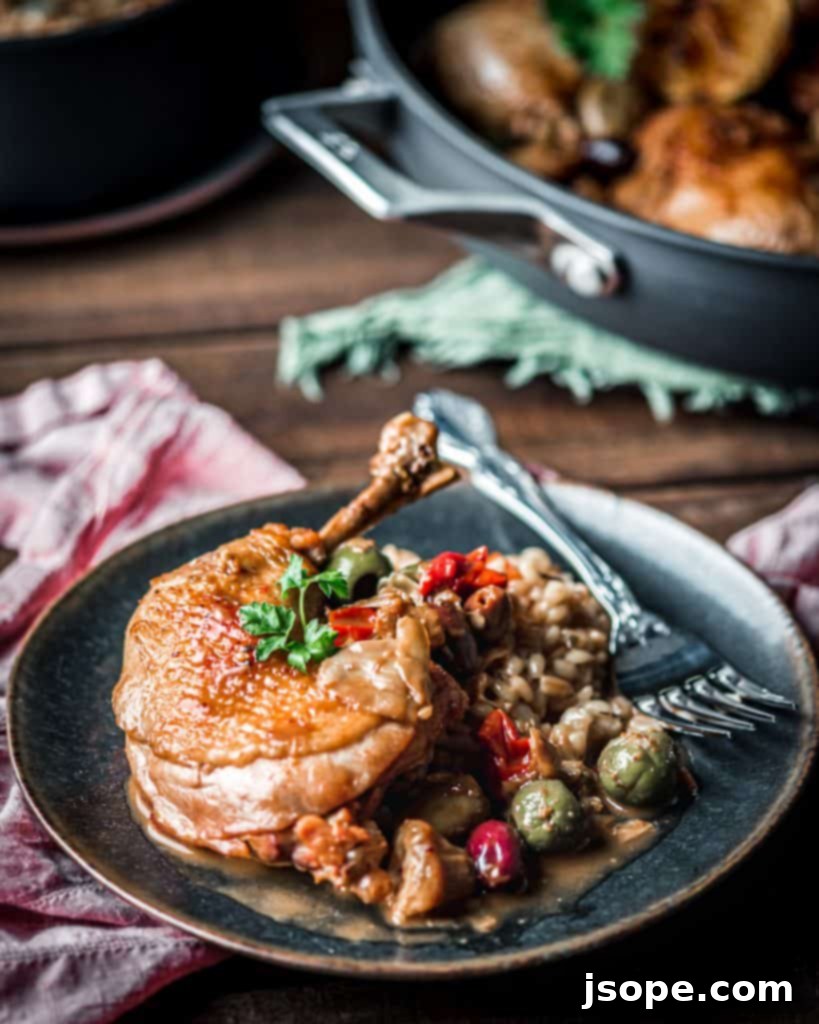
Let’s talk about chicken skin – an ingredient often overlooked, removed, or simply left on the plate. Most people recoil at the thought of soggy, fatty, or rubbery chicken skin, and for good reason! Who truly enjoys that texture? However, we firmly believe that when prepared correctly, chicken skin can be a glorious, integral part of a dish. Imagine it: golden, shatteringly crisp, and bursting with savory flavor. This is the magical part of the chicken we aim to achieve, and with our specific tips, you can transform that often-discarded element into a highlight of your braised chicken. It provides a vital textural contrast that elevates the entire dining experience, moving beyond mere tenderness to a symphony of sensations.
The Indispensable First Step: Searing the Chicken
The epic journey to achieving that perfect, crispy chicken skin commences with a robust and thorough sear in a hot pan. This initial high-heat exposure is not just for aesthetics; it’s a critical step that renders some of the fat from the skin and initiates the Maillard reaction, which creates those desirable complex flavors and a deep golden-brown crust. This process sets a strong foundation for the texture you’re striving for. However, it’s equally important to understand the nature of braising. As the chicken slowly simmers, absorbing all that luscious, saucy goodness, the skin will naturally rehydrate and lose its initial crispness, becoming soft and yielding. Anticipating this change is key to our strategy, and we have subsequent steps designed to restore that beloved crispy texture.
Strategic Pause: Removing the Chicken for Sauce Reduction
Once the braising process has tenderized the chicken, an often-overlooked but vital step is to temporarily remove the chicken pieces from the pan. This allows you to reduce the braising liquid independently. The primary benefit of this technique is twofold: it prevents the chicken from overcooking and becoming dry, ensuring it remains succulent, while simultaneously allowing the flavors of the sauce to concentrate and intensify without compromising the texture of the meat. As the sauce simmers, excess moisture evaporates, leaving behind a thicker, more flavorful, and aromatic liquid that will cling beautifully to the chicken.
Furthermore, removing the chicken provides the perfect opportunity to fine-tune the sauce’s consistency to your exact preference. This independent reduction also primes the dish for its final glorious stage: achieving that perfect crispy skin through broiling before serving. It’s crucial to remember that a magnificent sauce should never be used to mask or re-moisten dry, overcooked chicken. Instead, a truly exceptional sauce should possess its own vibrant flavor profile, derived from perfectly cooked chicken and a thoughtful blend of intentionally added ingredients. Our goal is to craft an astounding sauce that elevates an ordinary chicken dinner into a four-star culinary experience, all without demanding an excessive amount of your time – an irresistible proposition for any home cook!
The Grand Finale: Broiling for Ultimate Crispy Skin
Once your rich, flavorful sauce has reached its ideal, perfectly reduced state, it’s time to bring back that magnificent crispy skin. Gently nestle the braised chicken pieces back into the pan, ensuring the skin is facing upwards, partially submerged in the luscious sauce. Without delay, transfer the entire pan immediately to a super-hot oven, set to broil. While traditional broiling places food very close to the heat source, we recommend positioning your pan on the middle rack. This provides a more even, gentle heat that re-crisps the skin beautifully without the risk of charring or burning.
This final step requires your full attention. The chicken will only need to remain under the broiler for a very brief period, typically 2-3 minutes. Observe closely: as soon as the skin begins to turn a deeper golden brown and small bubbles form, indicating its crisping, it’s time to carefully remove the pan. Rely on your eyes and nose – you’re looking for that perfect crispness, not smoke or a burnt aroma. The reward for this precise timing is a beautifully crisp, golden, and incredibly FLAVORFUL chicken skin that offers a delightful textural contrast to the tender meat and rich sauce, perfectly complemented by the barley pilaf. A simple concept, yielding profoundly delicious results!
Unlocking Depth: Keys to a Truly Flavorful Braising Sauce
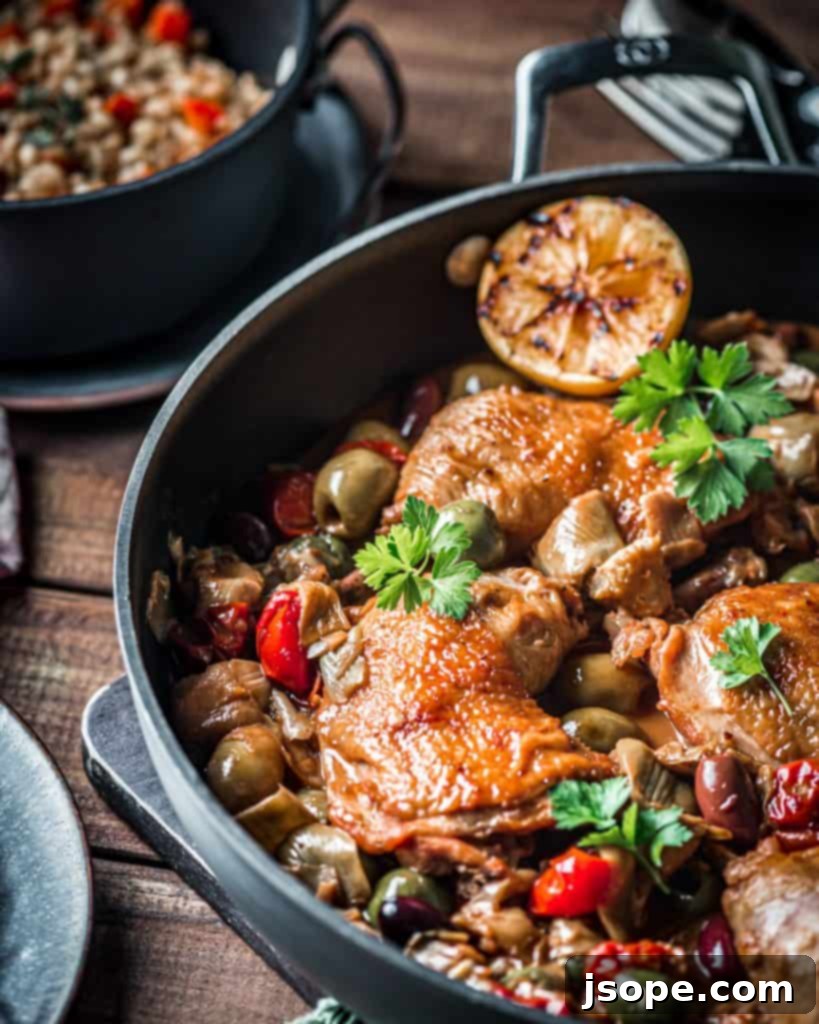
Having mastered the art of achieving that coveted crispy chicken skin, let’s now delve into the very essence of this dish: its intensely flavorful sauce. A truly exceptional sauce is what binds all the elements of a braise together, transforming good ingredients into a harmonious culinary experience. One technique we frequently employ to dramatically enhance the depth and complexity of our sauces is the strategic incorporation of wine or other spirits during the cooking process. For this particular Olive and Artichoke Braised Chicken, we’ve gone all out, including a delightful trifecta of dry white wine, rich port, AND aromatic brandy! Consider this your lucky day for flavor!
The technique of flambé plays a significant and exciting role in developing the profound flavors of this dish. If you’ve never attempted to flambé, do not be intimidated. While it certainly involves introducing fire into your kitchen, it is a deliberate and controlled process. The beauty of flambéing is that it rapidly burns off the raw alcohol, leaving behind only the concentrated, complex, and nuanced flavors of the spirits, adding a layer of depth that simply cannot be achieved otherwise. Beyond the flavor, it also provides a rather captivating light show!
So, if the prospect of flambéing seems daunting, take a moment to read through our detailed safety tips below and follow the instructions carefully. It might appear more challenging than it truly is. With a little confidence and adherence to best practices, you’ll find it’s a surprisingly accessible and incredibly rewarding culinary technique that significantly contributes to the rich flavor profile of your sauce.
But we must issue a crucial caution: fire is, indeed, extremely hot. It will cause burns if you are not careful! Please exercise the utmost caution and vigilance when flambéing any dish. Safety should always be your top priority.
Essential Safety Tips for a Successful Flambé
To ensure your flambé experience is both safe and creates maximum flavor, please adhere to these guidelines:
- Select the Right Pan: Always use a pan with rounded, deep sides and a long, heat-resistant handle. This design helps contain the flames and keeps your hands at a safe distance.
- Measure Alcohol Separately: Measure your brandy (or chosen alcohol) into a separate, non-flammable container. NEVER pour directly from the bottle into a hot pan, as the flame could travel up the stream of alcohol and ignite the bottle itself.
- Remove Pan from Heat: Prior to adding the alcohol, always remove the pan from direct heat. This reduces the risk of premature or uncontrolled ignition.
- Maintain Optimal Pan Temperature: The pan should be hot enough to ignite the alcohol but not so hot that it is smoking. If oil is smoking, it’s too hot and a potential fire hazard.
- Ensure Adequate Ventilation: If your kitchen is equipped with a range hood vent fan, activate it to a high setting to help draw away fumes and any smoke. If a vent fan isn’t available, move your pan to an open counter space, far away from anything flammable such as curtains, paper towels, or low-hanging cabinets.
- Keep Your Distance: Never lean over the pan while igniting the alcohol or while the flames are active. Keep your face and hands at a safe distance.
- Be Prepared to Extinguish: Have a tight-fitting lid readily available nearby. In the rare event that the flames persist for longer than 15-20 seconds, simply cover the pan completely with the lid to quickly and safely extinguish the fire by depriving it of oxygen.
Furthermore, and perhaps obviously, avoid holding small children, toddlers, or pets on your hip while performing this task (reiterating the point about being a “reckless cook”). You can successfully flambé with nearly any spirit that possesses a sufficiently high alcohol content to ignite, and even certain fortified wines. The ultimate goal of flambéing is to swiftly burn off the harsh alcohol, leaving behind the concentrated, rich, and deeply complex flavor compounds of the spirit you’ve used. This process profoundly enriches the sauce, adding an unparalleled layer of gourmet sophistication.
The Essential Accompaniment: Our Flavorful Barley Pilaf
Finally, no masterpiece of braised chicken would be complete without a truly exceptional accompaniment, and our Barley Pilaf rises to the occasion with its wholesome goodness and delightful flavor. While many individuals have undoubtedly encountered barley in various forms—perhaps unknowingly in a stew, or, more commonly, through beer or whisky—a significant number have yet to experience this versatile grain as a standalone side dish. This recipe offers a fantastic opportunity to discover the delicious potential of pearl barley, a grain known for its chewy texture and subtly nutty flavor that perfectly complements the rich notes of the braised chicken. The beauty of this pilaf technique is its adaptability; it can be skillfully applied to other grains such as white rice, wild rice, quinoa, or farro, demonstrating its versatility in your culinary repertoire.
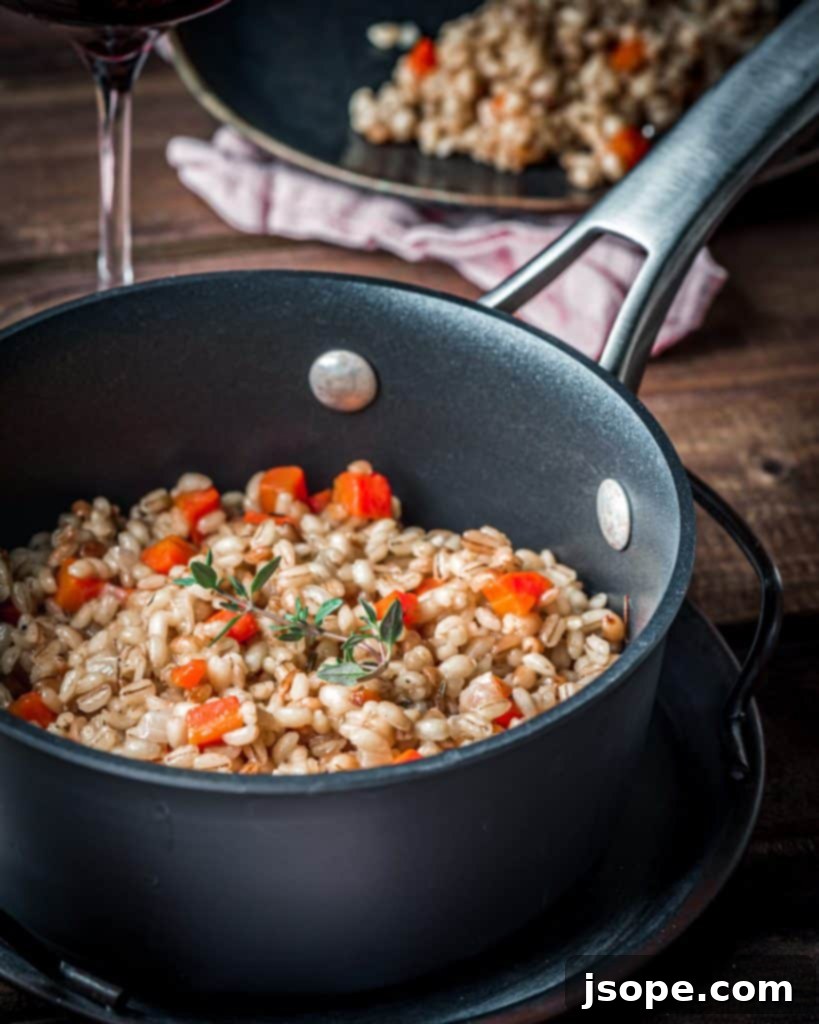
Technically speaking, this recipe employs a fundamental pilaf technique, albeit one that we prepare on the stovetop rather than in the oven, offering a more hands-on approach to perfect the grain’s texture. For this task, we rely on the excellent performance of the Calphalon PremierTM2.5 qt Sauce Pan with lid, which ensures even cooking and easy cleanup thanks to its superior nonstick surface. If you are familiar with preparing risotto, you’ll immediately recognize the similarities in the initial stages of this recipe. The core principle at play here is deliberate flavor building from the outset. By sautéing the pearl barley in butter, along with aromatic carrots and onions, for several minutes before introducing any hot liquid, you’re imbuing each grain with a foundational layer of rich taste.
The barley, much like a sponge, is literally eager to absorb flavors. When you introduce it to butter that has been meticulously used to sauté sweet carrots and pungent onions, you are guiding what liquid it will first imbibe. This crucial “toasting” step ensures that the barley actively soaks up a fascinating, deeply buttery flavor before the chicken stock is added to complete the cooking process. This careful layering of flavors results in a pilaf that is not only perfectly cooked and tender but also bursting with a savory richness that perfectly complements the main dish. We prepare this barley pilaf frequently in our kitchen, and it consistently delivers a satisfying and delicious experience, never failing to impress. The combination of the rich, savory Olive and Artichoke Braised Chicken with this flavorful Barley Pilaf creates a truly killer duo of tastes and textures!
Our Culinary Partner: The Calphalon Cookware Advantage
We are absolutely thrilled to announce our recent collaboration as part of the esteemed Calphalon Ambassador team! This partnership allows us to genuinely share and advocate for cookware that we not only passionately love but also consistently depend on in our daily culinary endeavors. Today, and in many exciting recipes to come, we are delighted to showcase some of our favorite Calphalon cookware items. For instance, the creation of this magnificent Olive and Artichoke Braised Chicken with Barley Pilaf was seamlessly executed using several exceptional nonstick pots and pans thoughtfully included in the comprehensive Calphalon Premier™ Hard-Anodized Nonstick 11-Piece Cookware Set.
Having rigorously tested and experienced nearly every type of cookware available on the market, we are profoundly impressed by the unparalleled durability, exceptional performance, and remarkable versatility that this Calphalon set consistently delivers. The hard-anodized construction ensures even heating across all surfaces, eliminating hot spots and preventing warping, while the advanced nonstick interior allows for effortless food release and incredibly easy cleanup. We were able to fluidly navigate every intricate step of this elaborate recipe – from searing the chicken to braising it to perfection, and gently simmering the pilaf – all without needing to reach for any cookware outside of this cohesive and high-performing set. This seamless experience speaks volumes about its thoughtful design and superior quality.
For those who have graciously followed our culinary journey over time, you are well aware that our recommendations are reserved exclusively for products we genuinely adore, personally use, and can wholeheartedly endorse. The Calphalon Premier™ Hard-Anodized Nonstick 11-Piece Cookware Set unequivocally meets these stringent criteria. If you are considering upgrading your kitchen essentials, or simply seeking reliable, high-performance cookware that simplifies complex cooking processes and elevates your overall culinary experience, we enthusiastically invite you to explore this outstanding collection from Calphalon. It is an investment that truly enhances every aspect of your cooking life!
Savor, Share, and Connect: Enjoy Your Culinary Creation!
We sincerely hope that you derive as much pleasure and satisfaction from preparing and indulging in this magnificent recipe for Olive and Artichoke Braised Chicken with Barley Pilaf as we do. It is a dish born from a passion for exquisite flavors and designed to bring warmth and gourmet delight directly to your dining table. Your culinary adventures and feedback are incredibly valuable to us and to our growing community of food enthusiasts!
If you’ve taken the plunge and given this delicious recipe a try, we would absolutely love to hear about your experience! Please take a moment to leave us a star rating and a thoughtful comment below, sharing your insights and how the dish turned out for you. Your contributions help others on their culinary journey. Alternatively, if you capture a stunning photograph of your completed dish, we encourage you to share it on Instagram and tag us @cooking_with_wine – we genuinely love seeing your beautiful creations and connecting with our amazing followers!
Should this recipe ignite a deeper passion for flavorful, meticulously crafted home-cooked meals, we warmly invite you to explore more cherished and popular recipes from our extensive collection. Discover your next favorite dish among these highly-rated selections:
- Crunchy Chicken with White Wine Lemon Butter Sauce
- Coq au Vin – Chicken in Red Wine
- Goat Cheese, Spinach, Basil and Prosciutto Quiche
- Summer Pasta (Pasta D’Estate)
- The Best Homemade Shrimp Scampi Recipe
📖 The Full Recipe: Olive and Artichoke Braised Chicken with Barley Pilaf
Olive and Artichoke Braised Chicken with Barley Pilaf
Pin Recipe
20 minutes
35 minutes
55 minutes
Main
American
4
servings
300
kcal
Ingredients
For the Chicken
-
4
cups
beef stock/broth, reduced in a saucepan down to 2 cups - Chicken Hindquarters (Leg and Thigh, skin on and bone in)
-
1
tablespoon
kosher salt -
2
teaspoon
ground white pepper -
¼
cup
olive or vegetable oil (50 g), enough to coat your pan - shallot – minced
- garlic clove – minced
-
1
oz
brandy (30g) -
1
oz
port wine (30g) -
4
oz
dry white wine (115g) - cherry tomatoes (about 185g or 6.5 oz)
-
1
cup
(160g) pitted olives – mixed varieties or your favorite -
1 ½
cup
baby or small artichoke hearts (240g) - lemon – sliced in thirds
For the Barley Pilaf
-
1 ½
cups
Pearl Barley (325g) -
⅓
cup
butter (80 g) -
1
medium carrot (70g) medium diced -
⅔
cup
chopped onion (100 g) -
24
oz
chicken stock (680 g) -
1
bay leaf -
4
parsley stems -
3
thyme sprigs - salt and pepper to taste
-
2
tablespoon
butter (40 g)
Instructions
STEP 1: REDUCE STOCK AND PREP INGREDIENTS
- Begin by pouring 4 cups of beef stock into a saucepan and placing it over high heat. Allow it to simmer vigorously until the volume has reduced by half, concentrating its flavors. While the stock reduces, use this time to meticulously prep all your remaining ingredients as specified in the recipe. This initial step for the stock reduction should take approximately 15-20 minutes.
STEP 2: SEAR THE CHICKEN TO GOLDEN PERFECTION
- Preheat your oven to 350ºF (175ºC) to prepare for the braising stage.
- Generously season your chicken hindquarters (leg and thigh, skin on and bone in) on both sides with kosher salt and ground white pepper. Heat the olive or vegetable oil in a large, oven-safe pan (such as a braiser or a deep, heavy-bottomed skillet) over medium-high heat. Once the oil is shimmering, carefully add the chicken pieces, skin-side down, and sear until a rich, golden-brown crust forms – this typically takes about 2-3 minutes per side.
- Once the chicken has achieved a beautiful, even browning on both sides, gently remove it from the pan and set it aside on a plate. Reduce the heat to medium-low and carefully drain off any excess rendered oil, leaving just a small amount (approximately 1-2 tablespoons) of the flavorful fat in the pan.
- Add the minced shallots to the residual oil in the pan and sauté for about 30 seconds until they become fragrant and slightly softened. Then, add the minced garlic and cook for an additional 15 seconds, stirring continuously to prevent it from burning. Return the seared chicken pieces to the pan, ensuring they are placed skin-side up, nestling them among the sautéed aromatics.
STEP 3: FLAMBÉ THE CHICKEN WITH BRANDY
- Ensure your reduced beef stock (from Step 1) is warm/hot in a separate saucepan. Once the chicken has been returned to the pan with the aromatics, briefly increase the heat to medium-high for about 1 minute to ensure the pan is adequately hot for the flambé.
- Once the pan is hot, remove it from the direct heat source. Carefully add the measured brandy (please review our detailed safety tips for flambéing earlier in this post for crucial precautions). Immediately and carefully ignite the brandy using a long kitchen lighter. Allow the flames to burn naturally until they self-extinguish, typically within 10-15 seconds, without moving the pan. Once the flame is completely gone, gently shake the pan to ensure no remaining brandy can re-ignite.
STEP 4: ADD WINE AND REDUCE FOR SAUCE BASE
- Return the pan with the chicken to medium-high heat on the stovetop. Pour in the port wine and dry white wine, using a wooden spoon to gently scrape any delicious browned bits (fond) from the bottom of the pan. This deglazing process adds immense depth of flavor to your sauce. Continue to cook for approximately 5 minutes, or until the wine and port have reduced by about half, and the sharp alcohol aroma has evaporated, leaving behind a fragrant, concentrated liquid. The exact reduction time may vary depending on the intensity of your stovetop’s heat and the surface area of your pan.
STEP 5: INITIATE THE BARLEY PILAF PREPARATION
- While the chicken sauce is reducing, simultaneously begin the preparation of your delightful barley pilaf.
- Thoroughly rinse the pearl barley under cold running water until the water runs clear, which helps remove excess starch. In a separate medium saucepan, combine the chicken stock, bay leaf, parsley stems, and thyme sprigs. Gently heat this mixture to a simmer, keeping it warm on a low heat setting.
- Meanwhile, in another medium nonstick skillet or saucepan, melt ⅓ cup of butter over medium heat. Once the butter is fully melted and lightly foaming, add the medium-diced carrots and sauté until they are nearly tender but still possess a slight firmness. Add the chopped onion and continue to cook with the carrots until the onion becomes translucent. Introduce the rinsed barley to this pan, stirring diligently to ensure each grain is completely coated with the flavorful butter and vegetable mixture. Reduce the heat to medium-low and cook for approximately 5-8 minutes, allowing the barley to “toast” and absorb some of the rich buttery essence.
- Carefully strain the warm chicken stock directly into the pan with the toasted barley. Season the mixture generously with salt and pepper to taste. Cover the pan tightly with a lid and cook on the stovetop over medium-low heat for approximately 20 minutes. Check the barley after 15 minutes to ensure it’s not becoming too dry; if so, add a small amount of water or additional stock and stir. After 20 minutes, stir in the remaining 2 tablespoons of butter. Taste the barley for doneness and seasoning, adjusting as needed. It should possess a pleasant, tender chewiness, neither hard nor overly mushy.
STEP 6: BRAISE THE CHICKEN IN THE OVEN
- To the pan containing the seared chicken and reduced wine sauce, add the cherry tomatoes, pitted olives, baby or small artichoke hearts, and the three lemon slices. Pour in the warmed, reduced beef stock, adding just enough liquid to come to the top of the chicken pieces without completely covering the skin.
- Bring the chicken and its contents to a gentle boil on the stovetop. Immediately remove the pan from the heat, cover it tightly with a lid, and transfer it to your preheated 350ºF (175ºC) oven. Braise for approximately 20 minutes. After this period, carefully remove the pan from the oven and check the internal temperature of the thickest part of the chicken using a probe thermometer. Aim for a temperature between 157-160ºF (69-71ºC). This initial braising step ensures the chicken is perfectly tender and nearly cooked through, preparing it for the final stage without the risk of drying it out. The subsequent broiling step will safely bring the chicken to the required final internal temperature of 165ºF (74ºC).
STEP 7: FINAL SAUCE REDUCTION AND CRISPY FINISH
- Carefully remove the braised chicken pieces from the pan and transfer them to a clean plate. Set them aside while you concentrate on finishing the sauce.
- Place the pan containing the remaining sauce back on the stovetop over medium-high heat. Allow the sauce to simmer and reduce further by another third, or until it reaches your desired consistency and the flavors have become intensely concentrated. This final reduction process typically takes about 5 minutes, significantly thickening the sauce and enriching its profile.
- Once the sauce has reached its desired reduction, remove the pan from the heat and let it rest for 3 minutes. Then, whisk in the remaining 1 tablespoon of butter, adding it one tablespoon at a time and stirring thoroughly until each addition is fully incorporated and the sauce achieves a glossy, emulsified finish.
- Preheat your oven to broil, ensuring the oven rack is positioned in the middle. Return the chicken pieces, skin-side up, into the pan with the finished sauce, giving them a gentle stir to coat. Immediately place the entire pan into the preheated broiler for a few minutes. Keep a very close eye on it: the goal is to crisp the chicken skin to a beautiful golden brown and warm the dish through, not to burn it. Once the skin is perfectly crispy and the chicken registers an internal temperature of 165ºF (74ºC), carefully remove the pan (remember, the handle will be extremely hot!). Serve this magnificent Olive and Artichoke Braised Chicken immediately alongside the hearty Barley Pilaf. Enjoy your masterpiece!
Nutrition
Calories:
300
kcal
Tried this recipe?
Let us know how it was!
